

Every now and then, my clients will ask for my availability so that they can book time with me. As I have a Google calendar, I wanted to see if there were any built-in features that I could use, rather than spending money on services that easily enable this for me. It looks like there’s a feature called Appointment Schedules!
Terminology
These are some terms I will use in this post:
- Appointment schedule: A set of dates and times where you are available for people to book appointments with you
- Booking page: A public-shareable page for people to book time with you
- Appointment type: Type of appointment people can scheduled with you. For example, I may want to have a 1-hour timeslot for my regular mentoring clients. However, I may also want to have a 2-hour timeslot for my clients who have weekly 2-hour meetings. I may want to have a 3-hour training event for those who want to book training sessions with me.
What Kind of Google Accounts are Supported?
I happen to have Google accounts of various types, so I’ve experienced these setups firsthand.
Personal Gmail Account
For a personal Gmail account, it looks like I get one booking page with one appointment type by default. I can upgrade to Google One Premium to get multiple appointment schedules.
Google Workspace
Many Google Workspace accounts may already have this feature rolled out. Some things to note:
Google Workspace Business Starter allows for a single booking page.
Google Workspace Essentials, Frontline, and older Google Workspace subscriptions no longer offered (looking at you G Suite) - No appointment schedules for you. You will need to upgrade to a newer Google Workspace for this feature.
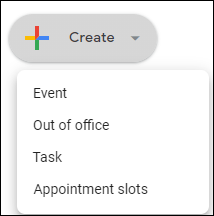
If you see the following under your Create menu, you don’t have appointment schedules yet. Appointment slots are going away in July 2024.
Setting up an Appointment Schedule
In order to create an appoinment schedule:
- Navigate to your Google calendar.
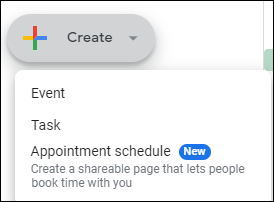
- From the Create menu, select Appointment schedule.
Create your appointment type with the following steps.
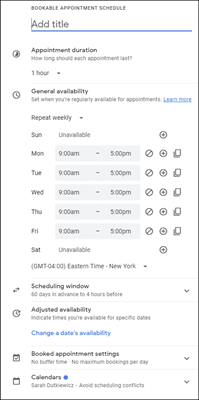
Give the appointment type a name.
Enter a duration. There are some default durations. You can also specify a custom duration in minutes or hours.
Set your general availability. Some other things to note:
- Carve out meal times and restroom breaks.
- If you have to do something like shuttle kids around, remember to carve those times out of your availability.
Set your scheduling window:
- Is this running forever? Or a particular date range?
- How far in advance can they book (in days)?
- What’s the minimum amount of time they can book before the appointment starts (in hours)?
Set your adjusted availability. If you need to change your availability for a single day, this is where to do it.
Set your booked appointment settings:
- Should there be buffer time between meetings? The buffer can be set in minutes or hours.
- Should there be a maximum number of bookings per day?
Connect to your Calendars. Also confirm that it should check your availability against that calendar. Note: The basic accounts have a limit of 1 calendar.
Select Next to move on to Part 2.
Verify that the Booking page photo and name are correct.
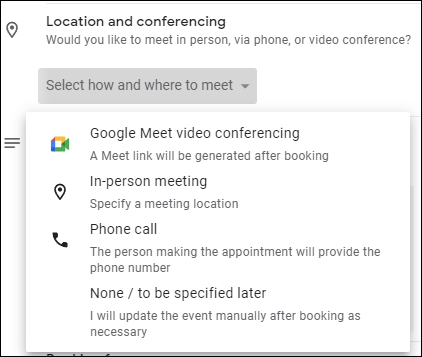
Set your default Location and conferencing. Options include Google Meet, In-person, phone call, and None/to be specified later.
Add a Description for the appointment type.
Select fields for the Booking form. Some things to note:
- Unfortunately, Google locks the options for First name, Last name, and Email address. So if you prefer a single Name field, that isn’t possible here.
- I add a Reason for appointment field as a Custom Item and required field. If there isn’t a good reason to meet, do we really need to have this meeting in the first place? 🤔
Confirm Book confirmations and reminders.
Select Save to save your appointment schedule.
Sharing Your Bookable Schedule
At the end of setting up your appointment schedule, you may see a message like this:
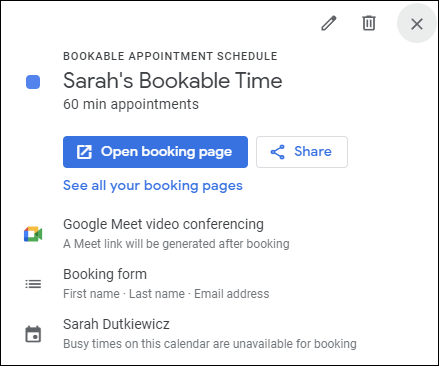
The Open booking page link will take you to your booking page that you can share with others and view as yourself as well as how others would see it.
The Share link will give you a link to your booking page as well as the code to embed your booking page in a site.
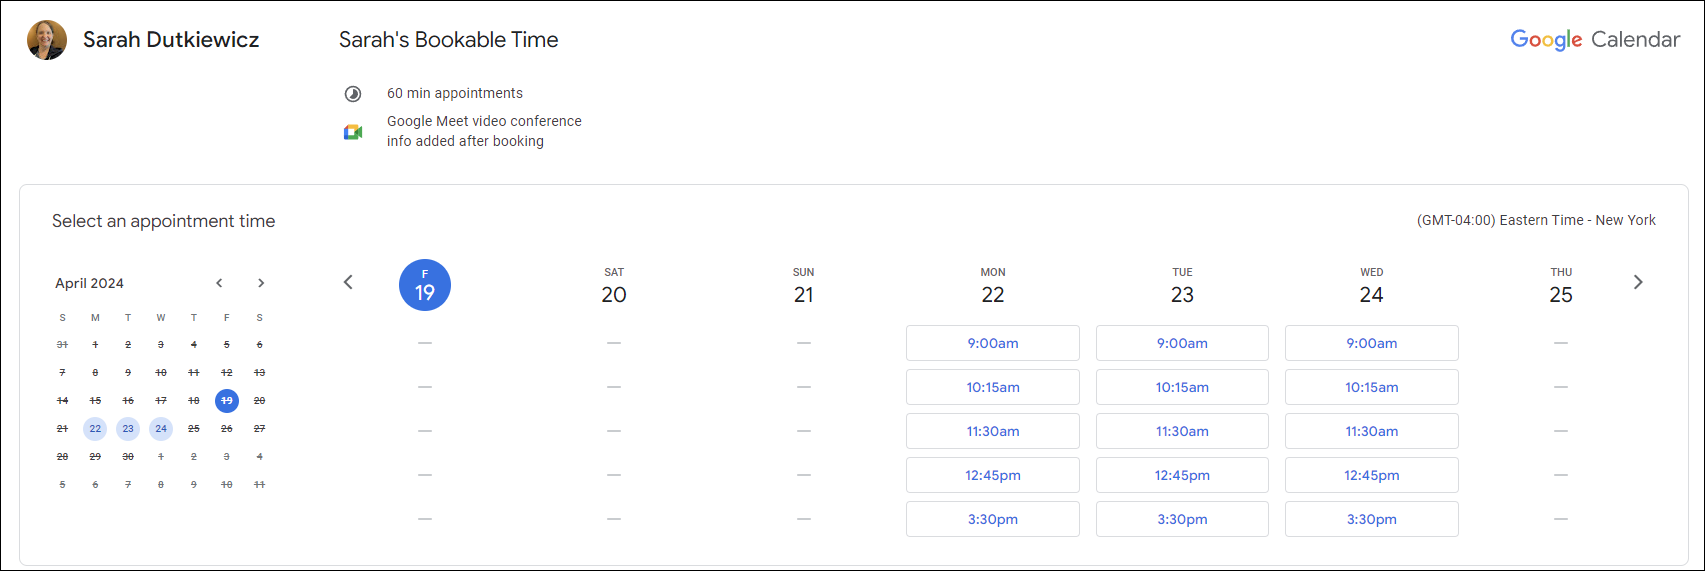
This is what others will see when they go to a booking page:
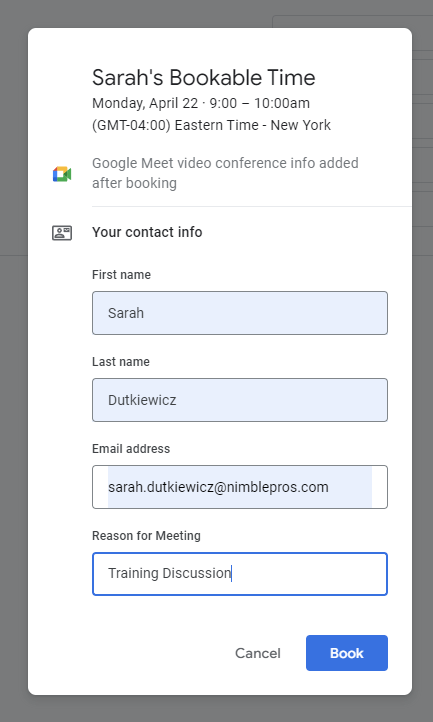
When they select a time, they will have to fill in the fields specified in the form:
Hey! I can’t find my bookable page link!
If you close out of the dialog that had your bookable page link, you might feel lost as to how to get to that again.
Your bookable slots will appear on your calendar. Select any of the non-booked bookable slots to get to the link for your booking page.
You can also edit your appointment type details from this page by selecting the edit button.
You can also trigger access to the appointment schedule by going to Create and select Appointment schedule.
Conclusion
If you find yourself managing appointments on Google Calendar, make it easy for your clients to book your time. Use the Appointment Schedule feature to set your availability. Let them use your Booking Page to book your time!