Now that we’ve launched another course on NimblePros Academy, I have a little more time that I can put towards eShopOnWeb and cleaning up its documentation.
We are moving the eShopOnWeb wiki to a documentation site. I have opted to use a GitHub Pages’ Jekyll site, and in this post, I’ll show you my setup so far.
If video is more your thing, you can see this here:
GitHub Pages’ Jekyll Site Requirements
GitHub Pages supports using the Jekyll static site generator. The current version of GitHub pages is using Ruby 3.3 and the Jekyll 3.x line. They maintain a list of Dependency versions.
What I like the best about this option is that I don’t have to maintain all of Jekyll’s dependencies and keep up on their versions. GitHub makes it easy for us by referencing their github-pages gem.
To run the site locally, GitHub has the following prerequisites:
- Jekyll
- Ruby
- Bundler
When I see a programming language, I already know that I want to go the route of dev containers. I don’t like making a mess of my machine with dependency chaos of multiple versions of a language or even multiple versions of a package. I prefer containing those.
Dev Container Setup
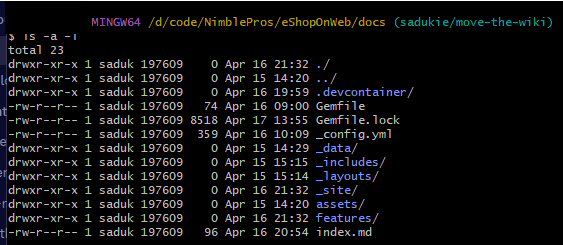
One of the practices I like to do is include a dev container within my docs folder.
The reason I do this is so that I can develop my documentation separately from whatever other dev containers I may have with my project. In the case of eShopOnWeb, there is a dev container for developing the eShopOnWeb code in C#. However, my docs platform is running Ruby. Rather than mix the platforms, I’ll keep a separate dev container.
I have a .devcontainer folder in my docs folder. Within the .devcontainer folder, I have a file named devcontainer.json. These are its contents:
// See https://containers.dev/implementors/json_reference/ for configuration reference
{
	"name": "eShopOnWeb Documentation",
	"dockerFile": "dockerFile",
    "forwardPorts": [4000, 35729],
    "runArgs": ["--name","eShopOnWeb_docs_devcontainer"],
    "postStartCommand": "bundle install && bundle exec jekyll serve --baseurl='' --livereload --force_polling"
}
I set a name so that it is clear what project is running. The forwardPorts are set to the port that Jekyll runs on (4000) as well as the port for live reload (35729). For the postStartCommand - once the container is started, then it will run the commands to bundle the application and run the Jekyll server.
There are 3 parameters that we include when running the Jekyll server:
baseurl- This is used when the GitHub Pages are run in a subfolder. We can configure the base as part of the Jekyll configuration. Including this parameter as part of thejekyll servecommand allows us to override what’s in the Jekyll configuration. For working in dev containers, the documentation is not hosted in a subfolder. This is why we override it.livereload- This allows us to make changes to our pages and then see those pages update live in our browser. This works on existing files by default.force_polling- This is what enables us to see changes with new files and data files. Since GitHub Pages uses Jekyll 3.x, thelivereloadoption isn’t watching the_datafolder, so data changes wouldn’t trigger an update normally. Force polling forces Jekyll to poll its folders for changes and update accordingly.
The devcontainer.json file also refers to a Dockerfile. So let’s look at that next.
Dockerfile
This is the Dockerfile:
# Create a Jekyll container for GitHub Pages
# See this for current supported versions: https://pages.github.com/versions/
FROM ruby:3.3

# Update the Ruby bundler
RUN gem update bundler

# Install Jekyll
RUN gem install bundler jekyll
I looked at the dependency list to see what version of Ruby was necessary. This helped me figure out what image to start with. Initially, I found a post that set up Jekyll using an Alpine-based container. However, that was for a much older version of Jekyll and Ruby. I wanted to make sure I had a image base that had all the tools needed for installing Jekyll. The ruby:3.3 image has the necessary tools. I also updated Bundler and installed Jekyll.
Jekyll Configuration
In the root of my docs folder, I have a _config.yml file for Jekyll configuration. This is my file:
baseurl: "/eShopOnWeb"
title: eShopOnWeb
description: "Sample ASP.NET Core 9.0 reference application, powered by Microsoft, demonstrating a domain-centric application architecture with monolithic deployment model."
remote_theme: pages-themes/midnight@v0.2.0
plugins:
- jekyll-remote-theme # add this line to the plugins list if you already have one
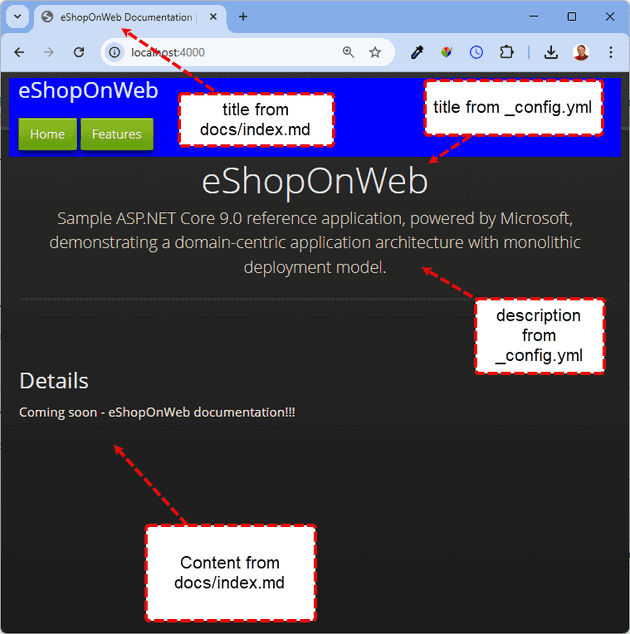
This is the file that sets up the important parts of Jekyll - including the baseurl for the site as well as the theme. The baseurl value in this file is what Jekyll will use by default, unless overridden in the command line. For GitHub Pages, they’re hosted at YOUR_NAME.github.io/REPO_NAME. The title and description appear on the home page.
Add a Gitignore File
Create a .gitignore file with the following entries:
_site/
Gemfile.lock
The GitHub workflow that is managed by GitHub will generate the site, so you don’t need to include the _site/ folder. The Gemfile.lock is only needed for running GitHub pages locally.
Add a Gemfile
In the root of your GitHub Pages site, add a Gemfile for the GitHub Pages gem:
source "https://rubygems.org"

gem 'github-pages' group: :jekyll_plugins
This is only needed for the devcontainer.
Note that there’s a warning on build by including the Gemfile. You may see this message:
“The github-pages gem can’t satisfy your Gemfile’s dependencies. If you want to use a different Jekyll version or need additional dependencies, consider building Jekyll site with GitHub Actions: https://jekyllrb.com/docs/continuous-integration/github-actions/“.
However, the GitHub Actions build will use the supported version of the github-pages gem.
Home Page
This is the demo I use for the home page - index.md in the docs folder:
---
title: "eShopOnWeb Documentation"
---

## Details
Coming soon - eShopOnWeb documentation
In this screenshot, you can see the title and description fields from _config.yml as well as the title and content from docs/index.md:
- The title in the tab comes from
docs/index.md’stitlein its front matter. - The eShopOnWeb title on the page comes from the
titlein_config.yml. - The description below the title on the page comes from the
descriptionin_config.yml. - The content for the page comes from the body of
docs/index.md.
This YouTube video contains a demo of the dev container in action. It shows the live reloading and force polling, by adding a new folder and file. We also add another link to the navigation that appears as part of force polling.
Conclusion
Since I can run GitHub Pages in a dev container, it’s even easier for me to say “yes” to GitHub Pages as a documentation option. They make it easy to get started with the platform with minimal maintenance. Now that you’ve seen how I run and edit my GitHub Pages locally, I hope it inspires you to work with GitHub Pages locally as well without the frustrations of running into dependency chaos on your local machine.


